The most requested alteration other than a hem or a sweetheart neckline is to the bust. Brides want to look voluptuous even if they are not.
So when I explain that the very un-natural rounded shape of the boned bust of their dress needs some padding (push up bust cups), they jump at the chance to have cleavage for the photos. But here are 2 brides that had different issues.
First up we have a corset back dress that needed the modesty panel cut in half:
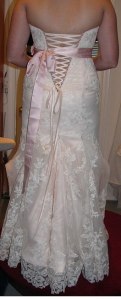 Not wanting/needing to display all the way down past her butt cleavage, the panel was trimmed down:

 so the result is:
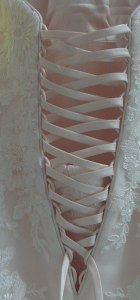 OK back is sorted out…let’s move on to the bust. Now no matter what padding we put in the bust area, it just is not enough to look natural without making the dress pull away from her chest. So we go for the second option, the dreaded bust dart in lace. You have all seen me do this before in this post but this time we have the added bonus of top edge piping…oh goodie!
First pin out the excess fabric someplace where it will not be obvious and thread trace in red thread a nice dart on the outside: Open the layers to get more access inside:
Turn the dress lining inside out and mark the lining too.
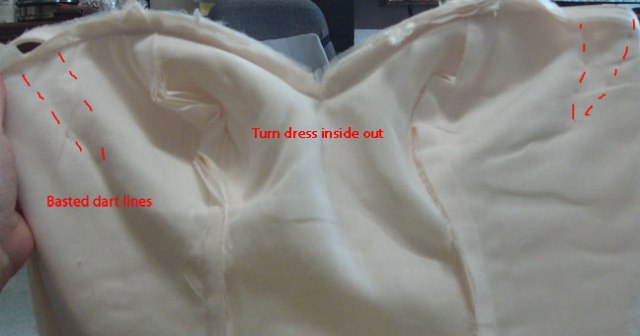
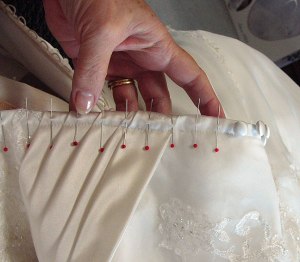
 Place the pins down the center of the dart for easy manipulation/folding and grabbing.
 Pin it flat:
 Hand baste it with white thread.
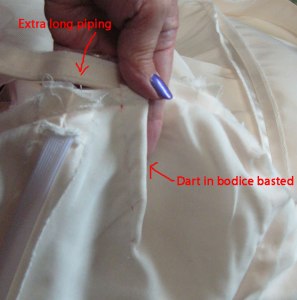
 Inside the bodice you can see an unusual sight of horsehair braid sewn right under the bust line for stability and thick twill tape covering the top of the boning along with the original bust pad. The piping on the right hand side is loose at this time.
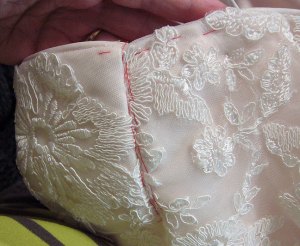 Here is the bust dart in the lace hand basted and ready to try on along with the lining hand basted too. The piping is cut so it will disappear gradually at the junction.
 Another view from the very inside lining.
Lining darts and bodice darts will be pressed flat and the piping will be trimmed off.
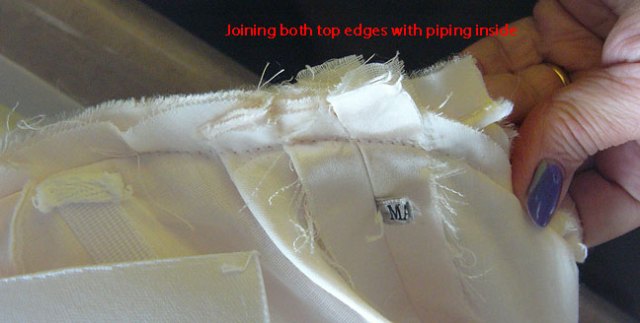
Baste bodice to lining with piping tuck inside the seam for try-on.
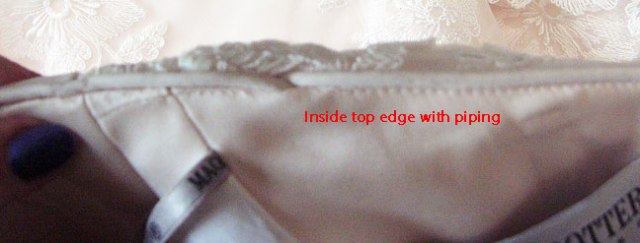
Permanent machine stitching done and the finished top edge…ahhh. Now the rounded boning has been padded (see new tan bust cup in side) and the fullness of the bust area has been brought in closer to her chest with no gaps.
OK, tall skinny girl sorted out but what about a pear shaped bride who had to order a size 24 dress to fit her hips?
When wedding gown manufacturers and designers think plus-size, they think that they have to enlarge all the areas the same. Here is the inside of that dress with a new large bust pad:
The bust area has been widened and deepened way beyond what is normal or necessary and there is horizontal boning as well joining all the other verticals. This puppy is made to withstand anything! But the bride is narrow on top and of average boob-age so even with padding, the center back zipper area has to be taken in 2 inches each side for a total of 4 inches: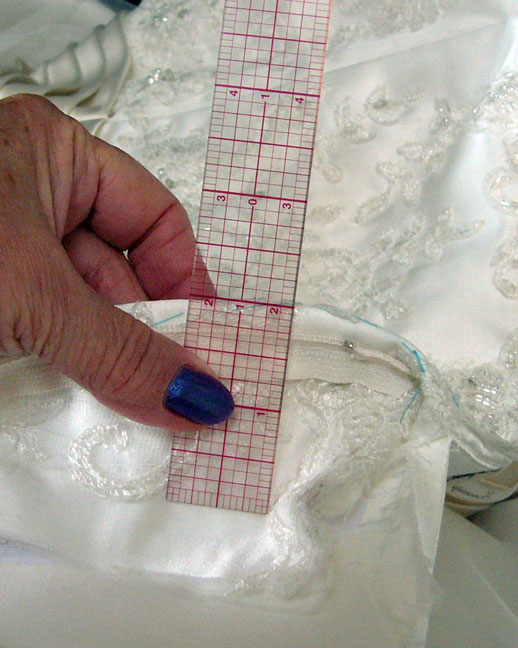
Then 17 buttons have to be re-sewn exactly 5/8 inch apart as there are loops on the opposite side that have to match up.
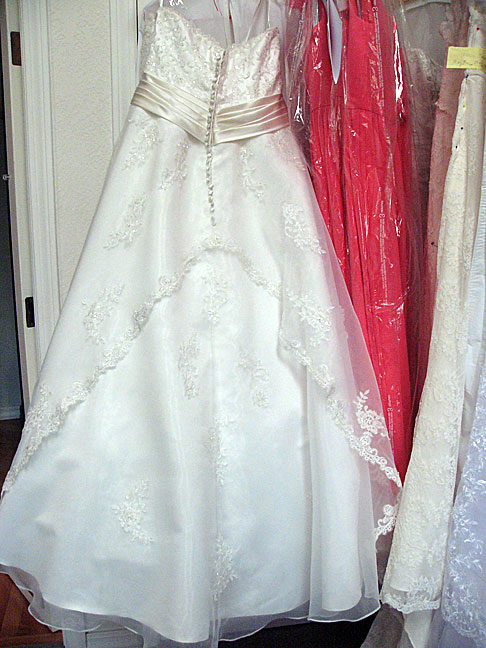
The finished back…have you ever seen this before? There is a very long detached train that snaps to the curved edge of organza for the ceremony…how clever!
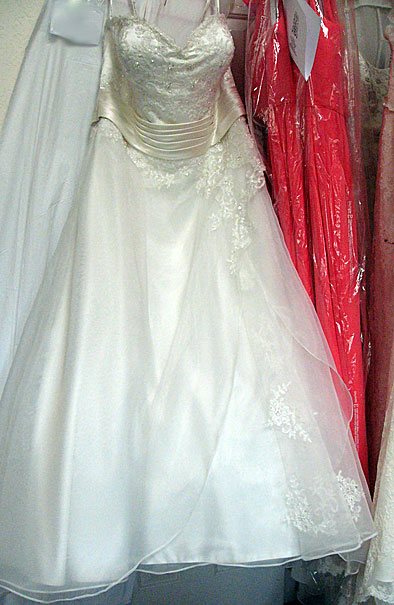
The front is now fitting well and hemmed all layers of satin and organza over-skirts.
So that is the little encounter of small busts this week and there are some real disasters coming up that need fixing and time’s a wastin’!
Happy sewing everyone and thank you for your continued viewing of the ASG video! https://www.youtube.com/watch?v=YBaIl4uRTac




Thanks for sharing. I learned a different way to go about the bust tuck treating each layer – outer and lining separately. If I could not do a fold and hide it under lace, etc…sometimes I would go into the side seam and take a larger seam from the front fabric only which can work but not easily.
Question: On the center back take in which required moving all of the buttons, why did you decide not you take a 1inch take in on each side seam adding to 4 inches. This can reshape the top but it appears easier that moving all of the buttons? If I can avoid moving a zipper, I will at all cost!! I think it is difficult to get them back to a flat factory appearance with all of the thickness.
Well Colleen, I would rather move a zipper, lapped or invisible than remove boning from the side seams and the lining times 4, then take in the fabric and lining times 2, then replace the boning times 4, reshape the top edge and loose front coverage. To move a zipper is an hour of my time and sewing on buttons less than a minute per button. Many of my sewing sisters would never tackle a zipper either. There was no other options to make vertical tucks or whatever since I had that pleated cummerbund to deal with as well. I took in the zipper all the way down to the last 3 buttons you can see at the bottom. I sew the zippers the way they were inserted in the factory…from the wrong side and they lay very flat and are steamed before the buttons are sewn back on. The elastic loops pull the buttons to the center and I tested them to make sure they sat just like all the rest. The buttons are also sewn like from the factory so no one can ever thing a relative had her way with the dress and did it for free…LOL. I always tell my brides that their altered dress will look as though it came that way from the factory. This particular dress fanned out 4 inches away from the body at center back and begged to be altered there as the bride had a very narrow back, if I had tackled the side seams, it would have made the center back area actually slide up as it came back towards her skin. Sometimes I just do what the dress tells me. Thank you for sharing!
What a gorgeous shade of ivory/pink/white in that first dress. I love it. I have never seen horsehair braid under the bust line, although I have seen petersham ribbon in pictures of haute couture garments. Sounds like a brilliant idea, imho. Would keep things snugly in place. Love all the pictures of the innards of these gowns. That size 24 seems to be extraordinarily well-made. I wonder if she paid extra… and just for such fantastic underpinnings in that gown.
I suppose I had not changed from how I was taught to sew by sewing on the top side of a traditional zipper. I will try sewing on the wrong side next time. Thanks for sharing that tip!! I suppose I hate moving zippers enough that I endure the hardship of boning!!! You may have an industrial machine with a more open bed or throat to the machine. Thanks for taking time to share your knowledge and experience!!
Somewhere I have shown how to stitch a zipper from the wrong side using the little woven line that comes with each regular zipper. It works great for the lapped side if there are beads or sequins as you are stitching over them from the wrong side, they just slide under the foot and fabric. I don’t have an industrial machine per se, just an Elna 720. Any machine with a zipper foot will work as the lapped side is very open when it is face down, another bonus. You start at the bottom and stitch to the top so you always have an open end to see and grab. Next time I have to do this technique, I have to remember to make another photo and include it.
I suppose I was also afraid that a bead would get stuck in the feed or break a needle. I am sure it would depend some on the size of bead. I will try this next time. I understand from your description. Thanks again for sharing….the last prom is in 2 weeks..but bridal will increase. Seeing these beautiful dresses and most often a happy gal keeps me sewing!….and laughing at some of your experiences that mirror mine!!!
So much work that no one sees- that is the rub- when you do it so well, no one knows- when you dont- everybody knows!!
Brilliant observation, Anne! I tell my clients that if it wasn’t for my photos of every gown, I’d never remember what I did since 90% of it is on the inside.
The finished gown looks great! Another creative solution 🙂
Thank you, Valerie!
I have not seen that sort of train arrangement. It is clever. I enjoyed your pretty purple fingernails!
Thanks, Shams…as you probably know sewing really takes it’s toll on nail polish…after a couple days it looks like I took an ice pick to them…oh wait…I did…hand sewing and pins rip it to shreds. If all brides had detachable trains life would be less stressful!
Thanks for showing your techniques and the insides of the gowns. The finished gowns look beautifully adjusted, you must have happy customers. The horsehair braid to support the bustline is a new idea to me.
Just started seeing horizontal horsehair recently other than the hems…maybe this is a new trend? My customers cry when they pick up their gowns…it’s a good sign.
The second dress is very pretty and the train idea is so clever. Your second client made me wonder why they don’t sell formal dress top and bottoms separately, like bathing suits, except they could be then sewn together. Viola! Less alterations. Oh, but I wouldn’t want to shrink your client base. Maybe not such a good idea. :0) You never cease to amaze me Mrs Mole. You are one amazing sewest / alterer / tailor / seamstress (how do you refer to yourself?) And you write one check of an interesting blog too!
Separate tops and bottoms…what a joy that would be! I call myself a seamstress…accent on the “stress” part.
SeamSTRESS. Perfect!
”’ check s/b heck (stupid autocorrect)
I do this all the time…ha ha
Yea, sometimes I wish there was a profanity setting for autocorrect. Lol
I still love reading about what you have been left with to alter even though my own work load has been reduced. Only two weddings booked in, and fewer prom dresses, so I can relax and enjoy seeing what you are up to.
Keep following for the next bunch are truly disasters waiting for a “come to Jesus” moment! One day I will be able to slow down…as 70 approaches I have my fingers crossed!
I am new to your forum, but not to alterations! I think the gown turned out lovely. I like the term my father once used and apply it to all ‘no one has to know’, type fixes:
” Good wallpaper hides all mistakes”.
Sometimes you just have to do what feels right. THANKS!
What a great saying!!!! Yes, the dresses do talk to me and point out where the excess or lack of fabric needs to be altered. My first 2 questions to brides is “when is the wedding date” and “what do you think needs fixing”…then I tell them what REALLY needs fixing. We work together and compromise a lot for the final product. Best of luck on all your projects!
I find your blog fascinating. I particularly enjoyed your recent one about bridesmaids’ dresses. I’m going to look for someone to alter (or help alter) my oldest daughter’s wedding dress to fit my youngest (breath easy – I’m in the UK). The reason I’m posting is because the idea of separates is great. DD1 has a 32/34H cup while DD3 is 34B and they want to have the dress for DD2 who is 36D! The bodice is boned and has cords, no zip. There’s a lot of flexibility but not quite enough, though maybe some chicken fillets would fill the bodice out enough, thinking about your cleavage comment. I wondered if the best option would be to make a completely new infrastructure for the bodice, a new bodice that is, and cover with the same lace etc, to keep that for later. So, separates. I like the idea of a detachable train, too.
One bride I had needed butt padding like women used to use..panniers …because the much gathered skirt just drooped in the back just below the waist and ruined the look. I ended up getting quilt batting and making a sort of flattened dog bed and attached it to the back of her dress to pouf it out. So lining a bodice with quilt batting could work as well to “fluff” her up.
Mm. So that’s adding to the dress, whereas chicken fillets are adding to the person, inside the bra. Do you call them chicken fillets in the US? Thank you
Yes, Anne, I think some people call them that. I have made then from shoulder pads when we just needed a little oval football shaped padding. Otherwise I have 2 bags full of boobs, some just full cup padding and some push-up from cup size A to D. I buy mine from Wawak in bulk since I usually go through 75 -100 a season.
These bust alterations are very well explained Mrs Mole, and I like what you have done with the lace and the piping – very neat work. The larger dress looks very pretty on the hanger and I bet she looks great in it. A well made, carefully fitted, full length white dress can really pull a larger girl together and make her look voluptuous and sexy. But I must say the idea of separates is great – especially with slim women appearing to have larger and larger breasts these days (in the 30s the skinny girls seemed to be flat chested – it was only matrons and older women who seemed to have “filled out” – I am wondering if it sedentary lifestyles, hormones in the chicken, the contraceptive pill, padded bras or surgery?
“sedentary lifestyles, hormones in the chicken, the contraceptive pill, padded bras or surgery?”
All of the above, Kate, and when they tell me they have just hired a personal trainer I tell them, “NO UPPER BODY WEIGHT LIFTING!” Nothing enlarges the upper back like that and causes the whole dress requirements to shift in that direction making the bust area even tighter and the zipper screaming. It’s a battle with brides mesmerized by their own reflection in the mirror while standing on the pedestal to get real…skip popcorn and bread and rice/potatoes for a month and drink water and walk walk walk…your dress and I will thank you!
Another entertaining and informative walk through bridalwear innards! Dresses as separates would be a good idea. My mother insisted on making my school dresses as two pieces, (for growth so they would do for two years!). Any style with a waist seam would lend itself to that treatment, but perhaps it would need too much stock for each style.
Giving nervous brides even more choices might not be a good thing…ha ha! They would really get into the mix and match thing wouldn’t they?
Do you ever get any regular brides that just want maybe a new hem? There must be a few out there. 😉
They are a rare breed, usually every bride wants a bustle as well and the longer they stand in front of the mirror, the more they ask for. It can be addictive!
I haven’t seen that kind of train before, but then I haven’t looked at a wedding dress for almost thirty years! Thank you for continuing to bring us these informative stories. I just figure half the time that the “fix” is impossible!
With my magic wand….all/most things are possible or worth trying! Thank you Linda, for stopping by!
On the idea of bridal separates-in the late early 1990s my sister got married and I was the matron of honor, plus she had 3 bridesmaids-and we did rent the attendant’s dresses in pieces. There were different bodices, sleeves, skirts, and then bonus pieces (e.g., a lace overskirt, a sash), all in different colors of poly satin and sizes from 0 to 28. Worked great in fitting out women with very different sizes and shapes-she said we could pick anything in her color, although the skirts had to be matching lengths (not shapes, just lengths). I wore a sweetheart bodice with puffy sleeves, a gathered skirt and the lace overskirt, and the rental cost about $50, much less than a dress. I don’t remember the company name; a woman ran the business out of her living room.
It all sounds so realistic and sensible…something has happened since then…greed in general in the bridal industry.